How to Fix a Wet Worm Bin Fast Before It Turns Into Sludge
If you open the lid and the bin smells off, looks shiny, or feels more like muck than crumbly compost, you’ve got a wet worm bin. That’s the moment to act. Fast. The good news is you usually do not need to dump the whole thing and start over. Most soggy vermicompost problems come from too much water-rich food, not enough dry bedding, poor airflow, or all three at once. Worms can survive a lot, but they do badly in a compacted, oxygen-starved sludge.
Your first move is simple: stop feeding for a few days and add dry carbon material immediately. Shredded cardboard is the best fix because it absorbs moisture without turning into a dense mat. Tear it into strips or rough pieces, fluff it up, and mix some through the top half of the bin. Then add another dry layer on top. If you have paper egg cartons, plain brown paper, or dry coco coir, those work too, but cardboard usually gives the best structure. Leave the lid slightly ajar if your setup allows it, or increase ventilation another way. You are trying to shift the bin from wet and packed to damp and airy. Think wrung-out sponge, not soup.
Figure Out Why It Got Soggy So You Don’t Repeat It Next Week
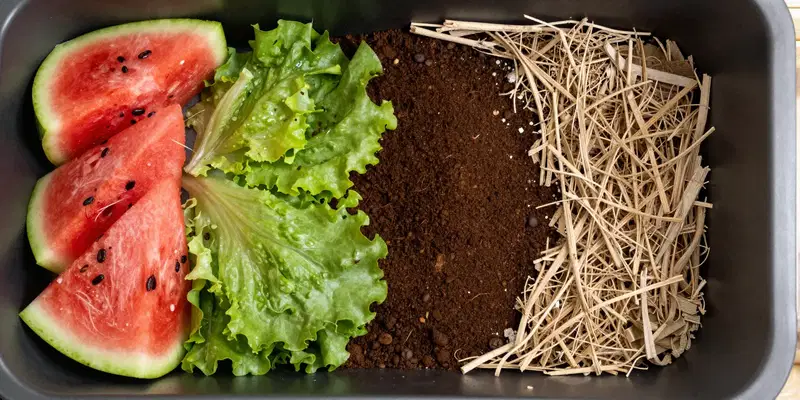
Beginners usually assume a worm bin gets wet because they added water. Sometimes that’s true, but more often the water came from the food itself. Melon rinds, cucumbers, tomatoes, squash, cooked leftovers, and huge piles of coffee grounds can dump a surprising amount of moisture into a small bin. If the bedding base was already thin, the system gets overwhelmed fast. That is one of the most common beginner compost problems: feeding by volume without balancing moisture.
Here’s the thing. Worm bins do not run well on scraps alone. They need bedding to hold air pockets and soak up liquid as food breaks down. If your bin is mostly decomposing food with very little torn cardboard or paper, the whole mix compresses. Once that happens, oxygen drops, anaerobic bacteria take over, and the texture turns sticky and heavy. Drainage helps, but it is not the main fix for an indoor worm bin fix. Balance is. Feed less, feed smaller pieces, bury food in different spots, and add dry bedding almost every time you feed. A very basic rule works well: for every handful of food, add a comparable handful of dry bedding. More if the food is especially wet.
What to Remove, What to Keep, and What to Leave Alone
You do not need to rescue every scrap. Actually, trying to micromanage a wet bin can make a mess worse. Go after the obvious problem items first: large slimy chunks of melon, dense layers of wet greens, clumps of soggy bread or pasta, and anything sour-smelling. Pull those out. If they are only partly broken down, you can freeze them and re-feed later in much smaller amounts, or toss them into an outdoor pile if you have one.
Leave the worms, castings, and most of the partially decomposed bedding alone unless the bin is truly waterlogged. If liquid is pooling in the bottom, gently lift and fluff the contents so trapped moisture can redistribute into fresh dry bedding. Avoid stirring the whole thing into paste. You want light mixing, not churning. Also, ignore the urge to rinse anything. A worm bin is not a kitchen sink problem. It is a balance problem. If there are fruit flies, deal with them by covering food better and using more bedding, not by soaking or spraying. And if the bin has a strong rotten odor, assume anaerobic pockets are present. Break those up carefully and add more dry absorbent material right where the smell is strongest.
The Fastest Indoor Worm Bin Fix When Things Are Really Bad
If your bin is beyond damp and has crossed into heavy sludge, do a quick half-reset. Set up one side of the bin, or a second container if you have it, with a thick bed of dry shredded cardboard and slightly damp paper. Not wet. Slightly damp. Then gently move the worms and the least-finished material onto that fresh bedding. You do not have to separate every worm by hand. They will migrate toward the better conditions on their own once you give them an escape route.
Keep the sludgy material on the other side and let it dry down before deciding what to do with it. Some of it can often be recovered by mixing in lots of dry bedding over several days. Some of it is just too far gone and is better used outside around non-edible plants after it stabilizes. If the bin is indoors, this split-bin approach works far better than waiting and hoping. It gives the worms oxygen now. It also keeps your house from smelling like a forgotten drain. For the next week, do not feed unless the worms have clearly settled and the texture in the rescue side feels springy and breathable. When you restart, use tiny amounts of food buried under bedding. Small corrections beat dramatic swings.
How the Bin Should Feel, Smell, and Behave Once It’s Back on Track
A healthy worm bin is damp but not slick. If you squeeze a handful, it should feel moist without dripping. The bedding should look textured and loose, not matted together like wet leaves in a gutter. The smell should be earthy, maybe a little sweet, never sour or rotten. Worms should be spread through the bedding rather than clustering on the lid or trying to escape. When they head upward or mass in the corners, they are telling you conditions down below are rough.
Once the bin recovers, keep it boring. That is the real secret. Do not reward the worms with a feast because they “look hungry.” Do not dump in a blender slurry. Do not add gallons of coffee grounds because someone online said worms love them. They do like many foods, but a home bin has limits. Build a steady routine instead: feed small amounts, freeze and thaw wet scraps before adding so they break down faster in smaller portions, bury food under bedding, and refresh the dry top layer often. If you want a simple check for beginner compost problems, lift the top and look before feeding. If you still see plenty of recognizable food, wait. If the surface looks dense or shiny, add bedding, not scraps.
Easy Prevention Habits That Keep Soggy Vermicompost From Coming Back
The best way to avoid another wet worm bin is to treat bedding as a regular input, not an emergency fix. Keep a box of shredded cardboard next to the bin and use it constantly. Every feeding should be covered with a dry, breathable layer. That one habit prevents smell, fruit flies, and most moisture problems in one shot. Chopping scraps smaller helps too, because it lets you feed less at a time while still spreading food across the bin. Smaller inputs are easier for the system to process and much less likely to collapse into a soggy mass.
Pay attention to seasons and room conditions as well. A bin in a cool basement processes food more slowly than one in a warm laundry room. That means the same amount of scraps can tip one system into overload while another handles it fine. If you collect a lot of watery kitchen waste, pre-drain it or mix it with dry bedding before it goes in. And skip the myth that worm tea dripping from a wet bin means things are working great. Usually it means the bin is too wet. Finished vermicompost should be dark, loose, and stable. If yours keeps trending soupy, the answer is almost always less food, more cardboard, and better airflow.